New Zealand’s network of cycle trails, scenic routes and relatively quiet roads make it an excellent destination for cyclists.
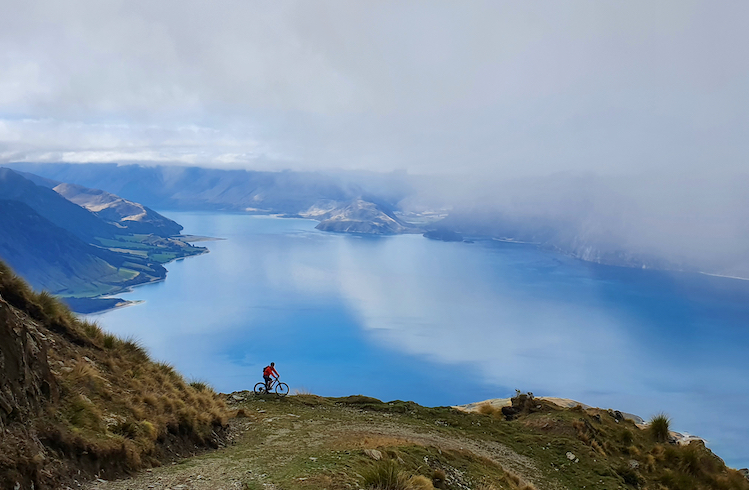 Photo © Mike Hartley
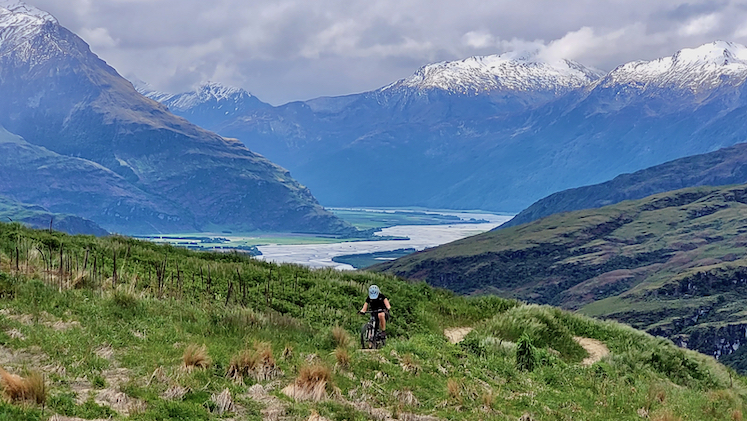
- Cycling on New Zealand roads
- Potential hazards
- Plan your route
- Safety tips for cycling on rural roads
- Bike trails and parks in New Zealand
- Plan your cycling gear
- Weather in New Zealand
From sub-tropical forests to high alpine passes, cities to remote desert roads, New Zealand’s roads, tracks and trails have it all and bring a few unique challenges to prepare for. This guide is packed full of useful tips on how to stay safe whilst making the most of your cycling adventures in Aotearoa, New Zealand.
Cycling on New Zealand roads
Before you begin any cycling journey, ensure your bike is in good mechanical order. If hiring a bike, this should be taken care of, but do a quick check of the brakes, tyre pressure, and basic set-up.
New Zealand’s roads vary considerably in terms of the quality of smooth surface, camber and shoulder space. Many roads are narrow and winding with no shoulder and often have large trucks and fast vehicles passing by – so it’s essential you’re confident riding on roads.
Knowing the road rules is key to staying safe. In New Zealand, helmets are compulsory, as are front and rear lights at night – and still a good idea during the day. Wear visible clothing and behave predictably, indicating clearly and in advance when turning and take the lane when appropriate.
Be aware that some New Zealand drivers and tourists are used to sharing the road with a different level of courtesy than you may be used to in other countries. Neither are they accustomed to the higher speeds possible by e-bikes. So, make yourself visible, allow room to pass when you can, and when planning your route, avoid major highways (riding on motorways is not permitted) and choose quieter roads where possible.
Potential hazards
Watch for train crossings, and always check both ways for trains, even if the crossing signals don’t indicate an imminent train. A unique feature of New Zealand roads that is a hazard for unfamiliar drivers and cyclists is one-lane bridges – be sure to check the right-of-way road signs on your approach. On some more remote roads, occasionally, one-lane bridges are also used by trains! In this instance, the give-way vigilance is even more important, and avoid letting your bike wheels slip into train track grooves that are sunken into the road, as your wheels can get stuck, and an abrupt stop could lead to some unplanned air travel.
Plan your route
If you’re planning your own cycling routes, make sure to calculate the distances between towns to understand where you can restock food and water. Be aware that in small towns, amenities may not be open after 5 pm and in some very small towns, there may be no shops or services. Plan to restock during the day and in larger towns. This is particularly pertinent to the Tour Aotearoa, a cycle route exploring the length of New Zealand from Cape Reinga to Bluff.
With just over 5 million people, New Zealand is less populated than many countries, so you can travel significant distances between places without seeing people or towns. Take tools and spare parts and make sure your bike is well maintained. Make sure you have enough food and water to cover the distances you plan to ride. For added peace of mind, let someone know where you’re going and when you plan to be there, and always remember to provide an update when you reach your destination or if your plans change. If you get into trouble, get lost or need to know something, ask a local – Kiwis are a welcoming and friendly bunch and will almost always help you if they can.
Safety tips for cycling on rural roads
Be aware that many of Zealand’s rural roads are unsealed. Ensure you are confident riding on loose gravel that is sometimes rutted, pot-holed and articulated with occasional cattle grids. Be aware that sheep and cattle are often moved via rural roads, and be prepared to wait and let them pass.
Always respect road closures, even if this means you need to revise your planned route along the way. Road closures are often for reasons you could never anticipate. Roads may be impassable due to rockfall, slips, avalanches, flooding – you name it, it happens. In a tragic example recently in the South Island, mountain bikers ignored a road closure on a farm track cut into the side of a steep mountain where cattle were being moved. The oncoming bikes startled the cattle, some panicked and bolted over the cliff’s edge, perishing on the rocks below.
Planning an outdoor adventure? Find out how travel insurance can cover activities, lost or stolen gear, medical emergencies, and more.
Bike trails and parks in New Zealand
To experience some of New Zealand’s countryside and wilderness by bike, you can plan day/multi-day rides via the many cycle trails and Great Rides. The Great Rides are 23 scenic bike trails spanning over 2,500 km throughout the North and South Islands.
For the Great Rides, check the Great Rides app/website and be sure to check distances, elevation profile, level of difficulty (the trails are graded) and estimated time the ride may take to prepare accordingly. (Some operators provide support with logistics/transport/accommodation for many of these.)
Trailforks is an excellent resource for bike trail info throughout New Zealand, listing all the information you could ever need to plan rides well-suited to your capability and fitness level. It’s always a good idea to check the trail conditions and see if there are any alerts/section closures. The gear checklist below will help you prepare for all types of riding.
The main tip to keep safe in the bike parks is to ride within your limits and wear protective gear – a full-face helmet, goggles, gloves, knee/elbow pads, and body armor if appropriate. Bike checks are essential when riding any gnarly terrain.
Plan your cycling gear
To help you plan, here’s a cycling safety gear checklist:
Clothes
- Helmet
- Gloves
- Visible clothing
- Wind/waterproof jacket
- Sunglasses to protect your eyes from harsh sun and dust.
Emergency kit
- First aid kit
- Food for emergencies (gels, muesli /choc bars etc.)
- Emergency blanket
- Emergency shelter
- Torch or headtorch (handy for repairs in low light or darkness).
Communication
- Mobile phone
- Battery bank for charging mobile phones in remote places
- InReach or PLB (personal locator beacon) if riding in remote locations. If you don’t own one, consider investing or hiring.
Protection
- Sunblock (the New Zealand sun is harsh)
- Insect repellent (Sandflies are an issue in some remote places – check before you go and use repellent)
- Knee and elbow pads if mountain biking.
Tools, equipment and spares
- Tools: including tyre levers, bike pump, Allen keys, screwdriver, chain tool, and puncture repair kit.
- Spares: including inner tube(s), chain quick-link, gear and brake cables where appropriate
- Water bottle or hydration bladder
- Bike lights – front and rear (headtorch may also be handy)
- Maps. If you are riding remotely, it’s worth having a paper copy in case of flat batteries or lack of mobile coverage.
- Chain oil
- Duct tape – doesn’t have to be a whole roll, a short length wrapped around the body of your bike pump will suffice.
- Zip ties
- GPS functionality that works offline – e.g., downloadable maps or Topo maps that operate outside of mobile reception
- Water purification tablets – helpful in the case of collecting water from a stream you can’t be sure is clean.
Ensure you know how to use your tools and fit spares before you ride. Even if you’re unsure, it’s worth carrying them as a helpful person on the route may be able to assist.
Because of the remoteness of many parts of NZ, it’s a good idea to ensure you know how to check that your bike is in good working order before each ride. Checks should include the following:
- Tyres and wheels for signs of damage, wear and correct tyre pressure
- Wheels spin smoothly and straight
- The function of the gears
- Brake pads and cables for wear
- Bolts and bearings are not loose
- Overall visual check of the bike.
Weather in New Zealand
Last but not least, when planning to ride safely in New Zealand, make sure you check the weather; it’s a case of constant vigilance is best! New Zealand’s climate can vary widely from north to south, and four seasons in one day can and does frequently happen in all regions. The weather can change extremely quickly and without warning, particularly in the alpine areas, so be prepared and ensure you are equipped for the conditions you may encounter.
Related articles
Simple and flexible travel insurance
You can buy at home or while traveling, and claim online from anywhere in the world. With 150+ adventure activities covered and 24/7 emergency assistance.
Get a quote
No Comments